Do you want to learn and practice Linux without install Ubuntu on you hard drive?
Virtual box is best option to run multiple operating system in same time. Meantime you can use your favorite Operating System Windows / Mac and you can learn how to use Linux operating System.
Linux is an Operating System. Before to use it you will have to install first on your Laptop or Desktop. But when you use virtual-box you don’t need to install on hard drive. You can use multiple operating system at same time.
Today I am going to tell you “how to install Ubuntu on virtual box in Windows 10″. This article
For the tutorial, I am using Windows 10 Machine, Virtualbox, and Ubuntu 20.04 ISO image.
Section #1: Software Requirements
I am using windows 10 machine, I have installed VirtualBox on windows machine if you are using Windows / MAC OS you can download and install VirtualBox from
Download Virtualbox: Link Here
When you finish installation of virtualbox then you move to next step >
Download the latest ISO Image of Ubuntu Operating System form following link. because You will need it at the time of installation of Ubuntu on Virtualbox.
Download Latest Ubuntu ISO Image: Link Here
When you have Installed virtualbox on your system and Ubuntu ISO image then move next step >
Section #2: Create Virtual machine compatible to Ubuntu 19.04
Virtual machine is similar as physical machine. It has RAM, Processor, Hard Disk, CD, Network Adapter and other hardware required for a Computer machine.
In virtual machine all hardware will be virtually not physically. Lets create a new virtual machine by following steps:
Step #1 Start Virtualbox
Double click on
Step #2: Click on New icon, after open VirtualBox manager.

Step #3 Name and Operating System:
You are going to create virtual machine for Linux – Ubuntu so fill the following system details:
- Name: Ubuntu 19.04 (You can give name whatever you want)
- Type: Linux (Type must be Linux)
- Version: 64-bit (32-bit ISO is not available for latest Ubuntu ISO)

Step #4 Memory Size
The recommended size is 1 GB, More RAM size means better performance.
If your computer RAM is more than 4GB then you can give 2 GB. I have 8 GB RAM of my system so I am giving here 2GB.

Step #5 Hard Disk
Without hard disk, there is no value of you system anymore, In virtual machine you can create virtual hard disk only. It will not impact on your real machine.
You are going to start a fresh, so select second one option.
Create a virtual hard disk now
Click on create for forward next step.

Step #6: Had disk file type:
There is multiple types of virtual hard disk. Virtual box supports 3 VDI, VHD and VMDK.
Don’t be confuse select first one VDI (VirtualBox Disk Image)
Click on Next to move next step

Step #7: Storage on physical hard disk
Allocation of storage on physical drive, It may be dynamically or fixed size.
Select Dynamically allocated and click on Next.

Step #8 File location and size:
By default hard disk size will store in C:/ drive in windows.
If you don’t have enough memory in c:/ drive then you can select another drive to save virtual hard disk file.
Click on Folder icon to change storage location.
Recommended size is 10 GB, I suggest you, give hard disk size more than 18 GB.
I am giving 32 GB, you can see in the image given bellow
After assign location and memory click on next to move forward.

You have created virtual machine for Ubuntu 19.04, Now its time to attach virtual DVD in Virtual machine DVD writer
Section #3 Attach Ubuntu ISO image in Virtual Machine
If you have installed any operating system before on machine, then you know very well, you have requirement of Bootable DVD / USB flash drive to install operating system.
Ubuntu ISO image will work as bootable DVD to install operating system on virtual machine.
So your next task is to attach ISO image as DVD. You can do by following given steps.
Step #1 Click on Settings.
You must select created virtual machine before click on settings. then click on setting
Step #2: Choose Virtual Optical Disc (Ubuntu ISO image)
Storage > Empty > Click on Disk Icon > Choose Virtual Optical Disk File..

Step #3 Browse location of Ubuntu ISO image:
Browse recently downloaded ISO file of Ubuntu, Then click on Open

Step #4 Verify connected ISO image:
You can verify as seen in below image.
Section #4: Install Ubuntu on Virtualbox Step by Step Guide
In this section, you will learn how to install Ubuntu 20.04 on a Virtual machine. Follow the given steps:
Start Virtual machine
Select virtual machine and click on start.
When you click on start the virtual machine will start with bootable ISO image. because new machine doesn’t have an operating system and have a blank hard disk. So it can’t be booted with hard-disk and will boot with DVD.
Step #1 Welcome Screen:
At this screen you will have to select language in left sidebar.
Then click on Install Ubuntu to forward next step.

Step #2 Keyboard layout:
Select you keyboard layout and click on continue. If you are not sure about keyboard layout then click on “Detect keyboard Layout”. This option will detect automatic.
Step #3 Update and other software:
Select Normal installation, under this option required basic software will install.
In other option select “Download updates while installing Ubuntu”.
Step #4 Installation type:
I assuming you a new user, so select option “Erase disk and install Ubuntu
You can select this option on virtual machine without any fear
Click on Install now to move forward

Step #5 Write the changes to disk:
Good, When you click on continue, New partition will be created in you virtual drive and formatted.
Click on continue.

Step #6 Where are you?
System want to know your localization, select your zone and click on continue

Step #7 Who are you?
Tell system about yourself like your name, PC name, Username and password.
I suggest you use strong password, It is compulsory to become habitual to put strong password every where
Click on continue:

Step #8 Installation started:
Installation has been started
Sit back on chair and have coffee, Buy one for me, and wait for some moment. installation will be complete soon.

Step #9 Installation complete:
Installation has been completed, now click on “Restart Now”,

Step #10 Login
When your U
Click on Login

Step #12 Make it Full screen:
Press Right Ctrl + F
Select View > Full-screen Mode
Step #13 First Look of Ubuntu 19.04
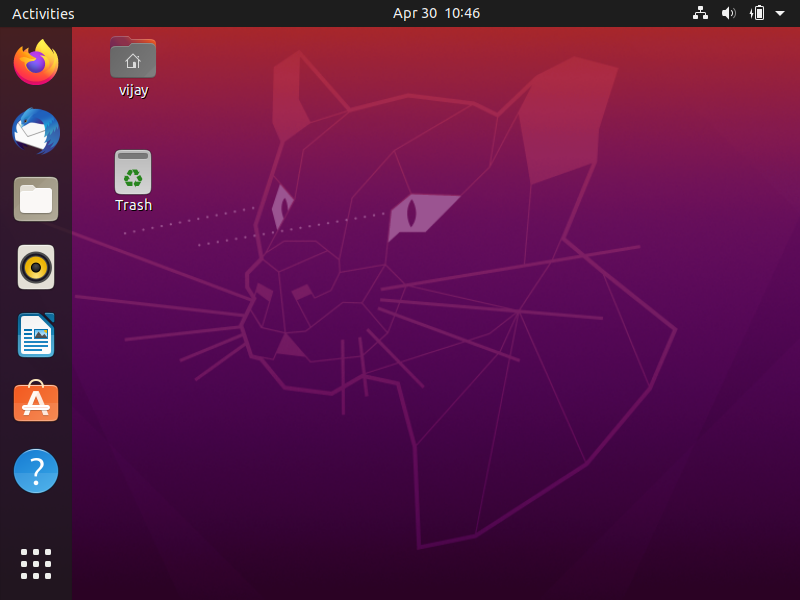
Conclusion
Now your Ubuntu (Linux) machine is ready to use. You can use it like a real machine. You must read little about virtualbox networking, So you will not face any type of networking problem.
If you have any question you can put in comment box or you can write me directly vijay@cyberpratibha.com without hesitation.
Source: How to install Ubuntu on Virtualbox Step by Step Guide
Join Us with Social Media:
No comments:
Post a Comment